Embarking on a 3D Modelling Journey with Blender
As emerging technologies like augmented and virtual reality gain momentum, I’ve decided to dive into 3D modelling and rendering. My goal is to design intuitive user interfaces for immersive environments, but have started with Blender as it provides a cost-free opportunity to familiarize myself with 3D workflows, rendering methods, and general terminology. My journey began with a basic introductory tutorial:
Continue watching episodes 2, 3, 4, 5 if you found the first one helpful.
My first project was a customized version of the house built using these tutorials. It uses simple planes, emitters and materials. I actually spent a lot of time in Blender just playing around and seeing what various features did to the basic scene once it was modelled.
Next, I figured I’d step up the difficulty and browse more complex house plans with numerous rooms, light sources, textures, and windows. After browsing dozens of plans I settled on these:
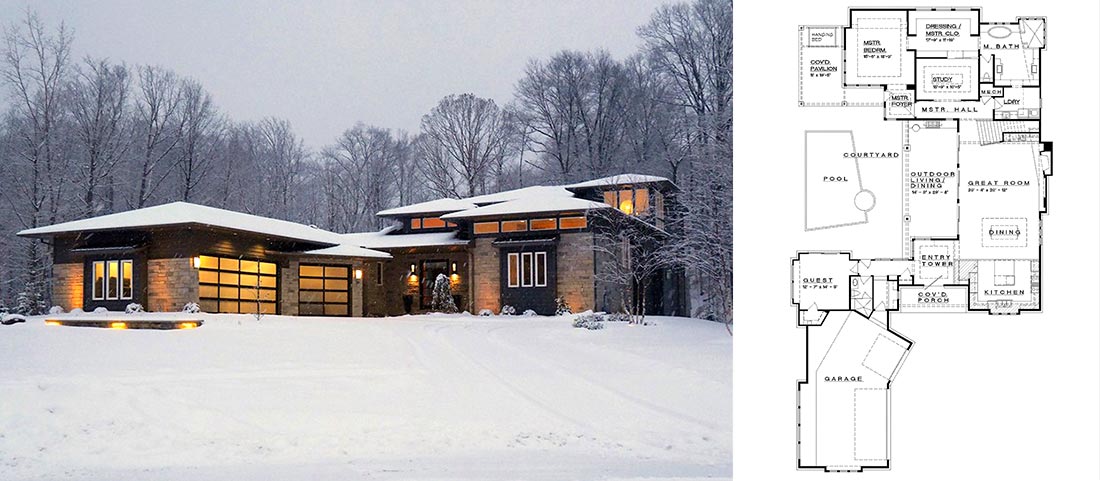
Download full house plans here.
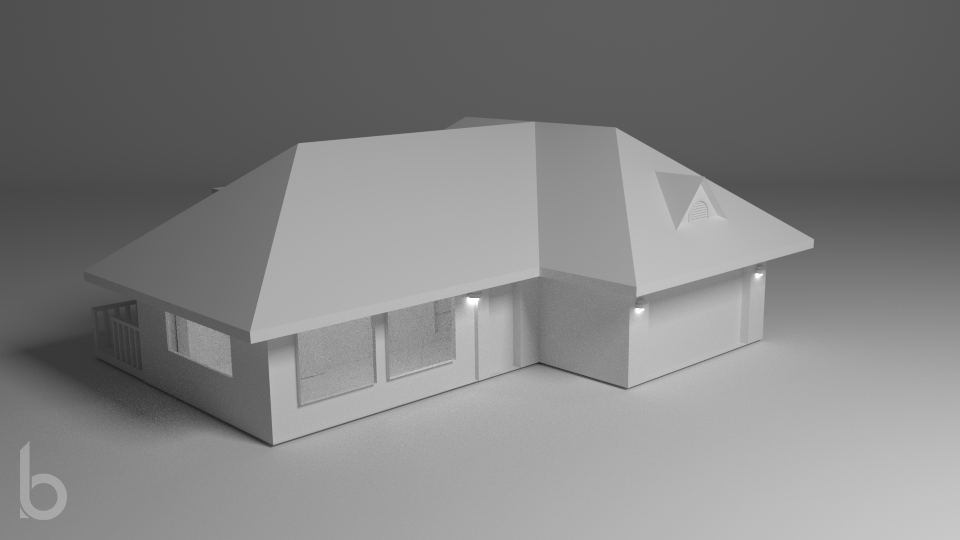
Once I had the plans, the work was pretty straightforward. Get the general foundation and structure in place and keep layering on the detail:


I started to add color, advanced material nodes, and textures pretty early on but in retrospect, I wish I hadn’t. I ended up advancing too quickly in an attempt to learn faster, and it ended up costing me. Despite some setbacks, I did however learn two very important techniques primarily from Blender Guru:
Technique 01: Use Blender Color Profiles over RGB
For the photography lovers out there, you know how much an additional few stops of light means to your overall dynamic range and exposure flexibility. This Blender color profile adds some serious rendering improvements when aiming for subtle contrasts and maximum range on your high and low contrast.
Technique 02: Use HDRI Lighting
Light your scene with an entire atmosphere of bouncing light. Wave goodbye to using a default sun lamp or large emitter.
In the end, I reverted my materials back to grayscale and restored a basic diffuse material node. I very likely will return to this project and finish adding materials to produce a full-color rendering with all the right textures. However, I’d rather break that step up into a number of micro-projects that will allow me to cruise through material after material to define the perfect setup. This project took about 36 hours to complete, but a lot of that time was used figuring out material node recipes that were never used in the final renderings.

If you know any great tutorials or have any tips, please share in the comments below!